One interesting perk about android devices is how flexible and tweakable they are. Most users explore the ability to customize their devices just the way they want, to meet certain desires of theirs. One of those procedures users commonly carries out on their device is rooting.
No doubt, some benefits come from rooting your android device. However, this could in some cases seem under-compensated for when the rooting leaves your device vulnerable to hacking or is done wrongly. This post shares with you the risks that come with rooting your device and the best way to do it if you desperately still want to.
What Rooting Terminologies Should I Be Familiar With?
A rooted device automatically gains access to commands and systems files that you previously couldn’t reach due to limitations programmed into the operating system by the builder. Handy rooting terminologies you should know are
Bootloader: Bootloader is the ground-level software on your device that boots up recoveries and then stimulates the main OS to come up.
Recovery: This is low-level software that can fabricate and bring back full system backups. It is usually accessed before the primary OS.
Android Debug Bridge (ADB): ADB is a command-line utility that is part of Google’s Android SDK. It supports interaction between a computer and your android device.
What Risks Come with Rooting my Android Device?

Even though there are plus sides to rooting your device, like more access to cool apps and version upgrades, rooting your android devices still comes with great risks. Find out below:
Your device could become a brick: This is simple. If you don’t apply the right rooting procedure, or mess up the process by modifying the device’s codes, you can damage your device. Your phone functions could get impaired or halted completely and can become as useless as a brick.
You invalidate your phone warranty: Rooting is a legal thing to do. However, doing it invalidates automatically, the warranty of the device you bought. For instance, in a situation where you rooted your phone, and then experience a malfunction after some time, the manufacturer is no longer liable for such hardware or software damages.
Your mobile security can become easily compromised by hardware: Gaining root access translates to breaching the security restrictions put in place by the Android operating system. This opens your device up to viruses, worms, spyware, and other security threats. These can easily infect the rooted software if it is not guarded by a strong antivirus.
This malware can get into your phone through several means. They include drive-by downloads, corrupt or untrusted links, and malicious third-party apps downloaded from app stores with a questionable reputation. When they infiltrate your phone, they make your device collect and catalog information without your knowledge and send it to cybercriminals.
Susceptible to Phishing; They also phish your emails, send messages to unknown parties, collect passwords, usernames, images, contacts, and other sensitive information like your credit card details that you enter into your device when shopping or making bank transactions.
How to Root My Android Device using Magisk
Due to the periodical upgrade in android operating systems, rooting has become a more complicated procedure. The good news however is, a more efficient and safer way of rooting your device has recently been introduced. It’s called Magisk.
You can find Magisk on GitHub
Traditional rooting patterns for android devices have met the rooting needs of users over the years. However, from Marshmallow, Google stopped the commonly used rooting methods that worked for previous versions. This action led to the adoption of root access known as systemless root. This does not alter the /system partition at all.
Google SafetyNet is another recently adopted security feature that serves to keep services like Android Pay safe. This presents android users with two options – choosing between root access and valuable services.
Magisk is provided to bridge this gap. This is an evolved type of root access on android OS. It is very essential because it preserves SafetyNet so users are still able to access Android Pay. It at the same time does not cause the disruption of important root tools like Xposed.
To get started with the Magisk file, the first thing to do is to get the Magisk file. Get the Magisk manager too. It will be of use later. After you have done this, copy both to your device’s phone storage or SD card.
Note that if you have used a different method to root your device, you will have to completely unroot your device before you start using Magisk. A custom recovery like TWRP will also come in handy in flashing Magisk on your device.
To begin the process,
Firstly, boot your Android into your custom recovery. The way to get this done varies on every phone. In some phones, you may have to hold down the power and the volume button at the same time. The volume keys are then used to boot “Recovery Mode.”
The next thing to do is to flash the Magisk file you moved into your phone earlier. Note that in TWRP this means clicking Install then finding the Magisk file. After you’ve done this, click Install Image.
Make sure all the details are right and then swipe to confirm the flash. (Install zip/swipe to confirm flash) The file takes some moments to flash. Once it’s completed, click the reboot system button.
Install the Magisk manager you downloaded once the phone boots back up. Note that to install the app, you need to enable the unknown sources first. To do this, go to Settings, then Security and Unknown sources, and then switch the toggle to accept the warning.
The next step is to install the Magisk Manager. You can find this in the downloads folder if you downloaded it directly to your phone. Alternatively, you can do it with a file explorer, if you moved it from your computer.
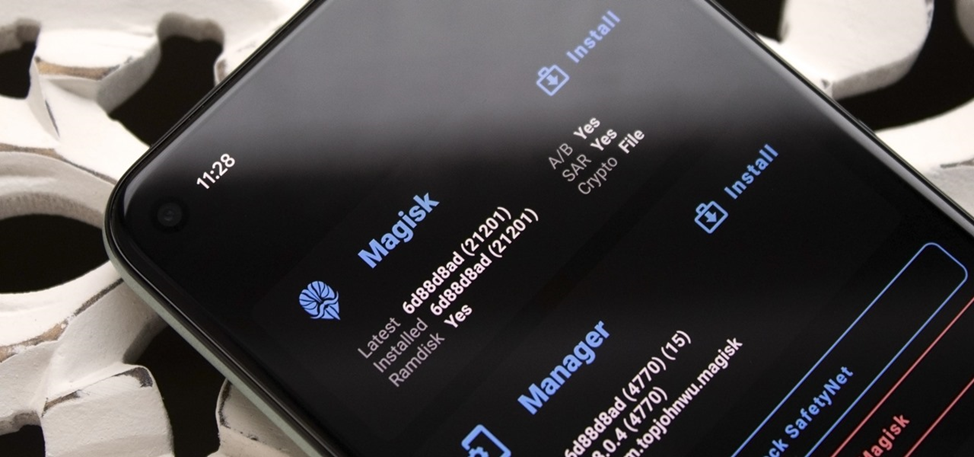
It should come up on the status page once installed. There, it will show that it’s currently running the recent version and correctly rooted. With this, you’re ready to start using Magisk.
How to Use Magisk


Magisk is built to be an all-encompassing package for root management, root app installation, and much more. It is user-friendly and easy to understand. It’s even easier if you’ve used a rooted device in the past.
The breakdown of the menu is given below. You can access this by swiping in from the left-hand side:
Status: This displays the version currently installed on your device. It also shows the root and SafetyNet status.
Install: It works for Magisk installation directly from the app. This is useful once you have passed the initial setup stage and want to keep Magisk up to date.
SuperUser: This is the SuperSU section of Magisk.
Modules: These are all the presently installed Magisk modules.
Downloads: This is where you will download Magisk modules.
In the settings menu, there are some other advanced options. This is a breakdown of what they’ll do:
1. Dark Theme: This changes the theme of the app.
2. Update Notification: This notifies you if there’s a new version of Magisk available.
3. Clear Repo Cache: This refreshes the repository of the Magisk app.
4. Magisk Core Only Mode: This is Magisk in its most basic form with just hiding, superuser, systemless hosts, and busy box: This is essential when your device doesn’t pass the SafetyNet check. All you have to do is enable it.
5. Magisk Hide: This obscures Magisk from common ways that some apps use to restrict access due to root status.
6. SuperUser Access: Here, you choose what services are permitted to request superuser access.
7. Automatic response: This automatically prompts, endorse, or reject superuser requests.
8. Request Timeout: The duration of time Magisk waits before rejecting a request.
9. Superuser Notification: This comes up when an app gets superuser permission.
Most of this menu is enabled passively. They run in the background, except for Magisk Hide. When you’ve enabled this, a new option pops up in the menu – Magisk Hide. Here, you can command Magisk to hide from certain apps. Android Pay is on default. However, you can choose any other one that won’t work on a rooted device.
In cases where your device doesn’t pass the SafetyNet check, certain apps like AndroidPay won’t function until that is taken care of.
In conclusion, Magisk is the solution to many of the root management issues that Android users have been confronted with since MarshMallow. If you follow the steps shown above to set it up, it should enable you to use your android device without necessarily losing the root tools in your device.
What Should I Do after Rooting my Device
After rooting your phone, there are a couple of things you can do to get the best user experience. Some of these include backing your stock boot image, getting SafetyNet sorted, and enhancing the security of your device with biometrics.
Rooted devices come with fresh responsibility. Some of the perks that come with your new superuser status are uninstalling bloat, blocking ads, e.t.c. A list of things you can do after rooting your android are highlighted below:
Use your Biometrics to Keep Superuser access Secure
Have this in mind – once you’ve rooted your device, apps can demand root access at any time. This comes up in form of pop-ups asking you to grant or deny permission. It could be risky to leave this exposed to a third party. Fortunately, Magisk has a feature that allows you to scan your fingerprints before root access can be given to any app.
Debloat
Even though it’s a simple procedure to remove bloatware without using a computer or rooting, it’s still so much simpler to remove default system apps with root. A lot of the default system applications contain a lot of invasive permissions you can’t disable and eventually can slow your device down.
All you should do is install the debloated module in Magisk manager. After doing this, type “debloat” into any terminal app. Here you’ll be provided an interface for getting rid of different kinds of bloatware. This bloatware includes system apps, vendor apps, priv-apps.
Get Xposed Modules
Once the framework is installed, ensure you utilize its function maximally. Some modules may trip SafetyNet. This depends on what they alter. Typically, modules that how an app functions or the appearance are harmless. However, the ones that change the android itself may cause serious issues.
Explore Magisk Modules
Magisk Modules are priceless, in that they can execute more duties than just blocking ads. To exploit this, open the Magisk Manager app and click on the icon of the floating menu bar at the bottom of the screen. You can search for a list of all the official modules on Magisk.
Tweak Your Kernel
Custom ROMs are very nice, however, you need not go through the hassle of changing your whole operating system to get the optimal performance you desire from your device. A kernel manager app can carry out functions like overclocking your CPU for optimal performance. It can also step down the volt to enhance the battery life.
Changing your CPU governor can seriously affect your device’s performance.
Cyber-security Tasks your Rooted Device can Perform
Rooted devices attain new and higher software features after the root. This also includes the ability to be used for higher security tasks. They also now permit some advanced security features and apps.
Penetration Testing

A penetration test is a simulated cyber-attack aimed at checking for safety loopholes or vulnerabilities. When applied to app security, penetration testing is widely employed to supplement a Web application firewall (WAF).
Some penetration testing procedures could include attempted compromise of some application systems. This could be an Application Protocol Interface (API), to phish out vulnerabilities like unsanitized inputs that are vulnerable to attacks.
What are the stages in Penetration Testing?
Penetration testing stages are in four steps:
1. Reconnaissance and Planning: In the first stage, the scope and goals of a test are mapped out. This also includes the systems to be tested and the testing pattern to be used. The target is also heavily researched.
2. Scanning: In the next step, understanding how the target application will react to the planned intrusion is vital. It is carried out using static and dynamic analysis.
3. Gaining access: In this stage, web application attacks like SQL injection and cross-site scripting are used to test the security of the target.
4. Maintaining access: This stage aims to see if the susceptibility can be exploited to achieve a persistent presence in the target system.
5. Analysis: In this final stage, the result of the penetration test is constructed into a comprehensive result. This result shows the vulnerabilities detected, sensitive data touched and the duration the breach was able to stay in the system undetected. Steps for remediation may also be included in this step as well.
To learn more about penetration testing check out this article
What Penetration testing methods I can Use on my Rooted Android Device?
External Testing: The goal of this is to obtain access to very important data. It targets a company’s data that are visible on the internet. Some of these data are the company’s website, email, and domain name servers (DNS).
Internal testing: In this kind of testing, a tester can penetrate an application’s firewall and incite an attack by a malicious insider. A common real-life scenario would be an employee’s credential theft.
Blind testing: The only information provided in blind testing is the name of the company. With this, security personnel can simulate how a real attack can happen.
Other cyber-attack simulation tools that your rooted device can be used for include:
XM Cyber: XM Cyber provides advanced Persistent Threat solutions. This enables your rooted device to be one step ahead of the potential attacker. You can choose a target to run, set up running attacks, and receive prioritized feedbacks.
Picus: Picus is a security management solution that enables you to constantly measure and scan for security threats to always stay proactive in the safety of your device from cyber-attacks. The dashboard is easy to configure and use. This security breach and attack simulation intensively attacks your android device to determine if your defenses are tough.
NeSSi2: It stands for Network Security Simulator and it is an open source tool. It is majorly concerned with testing intrusions and detecting algorithms, network analysis, and automated attacks.
Conclusion
If you are still interested in rooting your android device, ensure you follow the guide provided here promptly. Also, always ensure an effective antivirus is installed on the rooted device.
Magisk is an important and user-friendly rooting management tool. Ensure you follow the steps highlighted in this post to download, install and use it for your safe rooting procedure and experience.