Like many other smart gadgets, including other iOS devices, Apple TV is susceptible to security threats on a general note. Always keep in mind that the best security practices for your hardware appliances and gadgets always come with tremendous rewards.
The first thing you should be very conversant with is how to set up your Apple TV and the security measures you need to keep it from third-party infiltrations. This post highlights everything you should know on how to go about getting it done.
How To Set up my Apple TV

It is highly recommended that you use strong proxies when setting up your Apple TV. One good proxy you can rely on for efficiency is Charles proxy. Charles proxy is a debugging tool that decrypts web traffic.
It is a pretty simple process. Hence you can set it up yourself if you follow carefully the procedures laid out here. However, it has gotten a little confusing with the removal of the USB-C port from the Apple TV 4K. So, you will be provided with the information you need for previous types and recent ones here.
Firstly, you need to install a profile through Apple Configurator. For 4K Apple TVs to work, they need to be paired with Apple Configurator, and it must be done over the network. You also need to have installed the latest Charles proxy and Apple configurator before proceeding to pair.
For 4th generation Apple TV and lower versions, follow these steps:
- Get your Apple TV connected to your Mac computer using USB-C
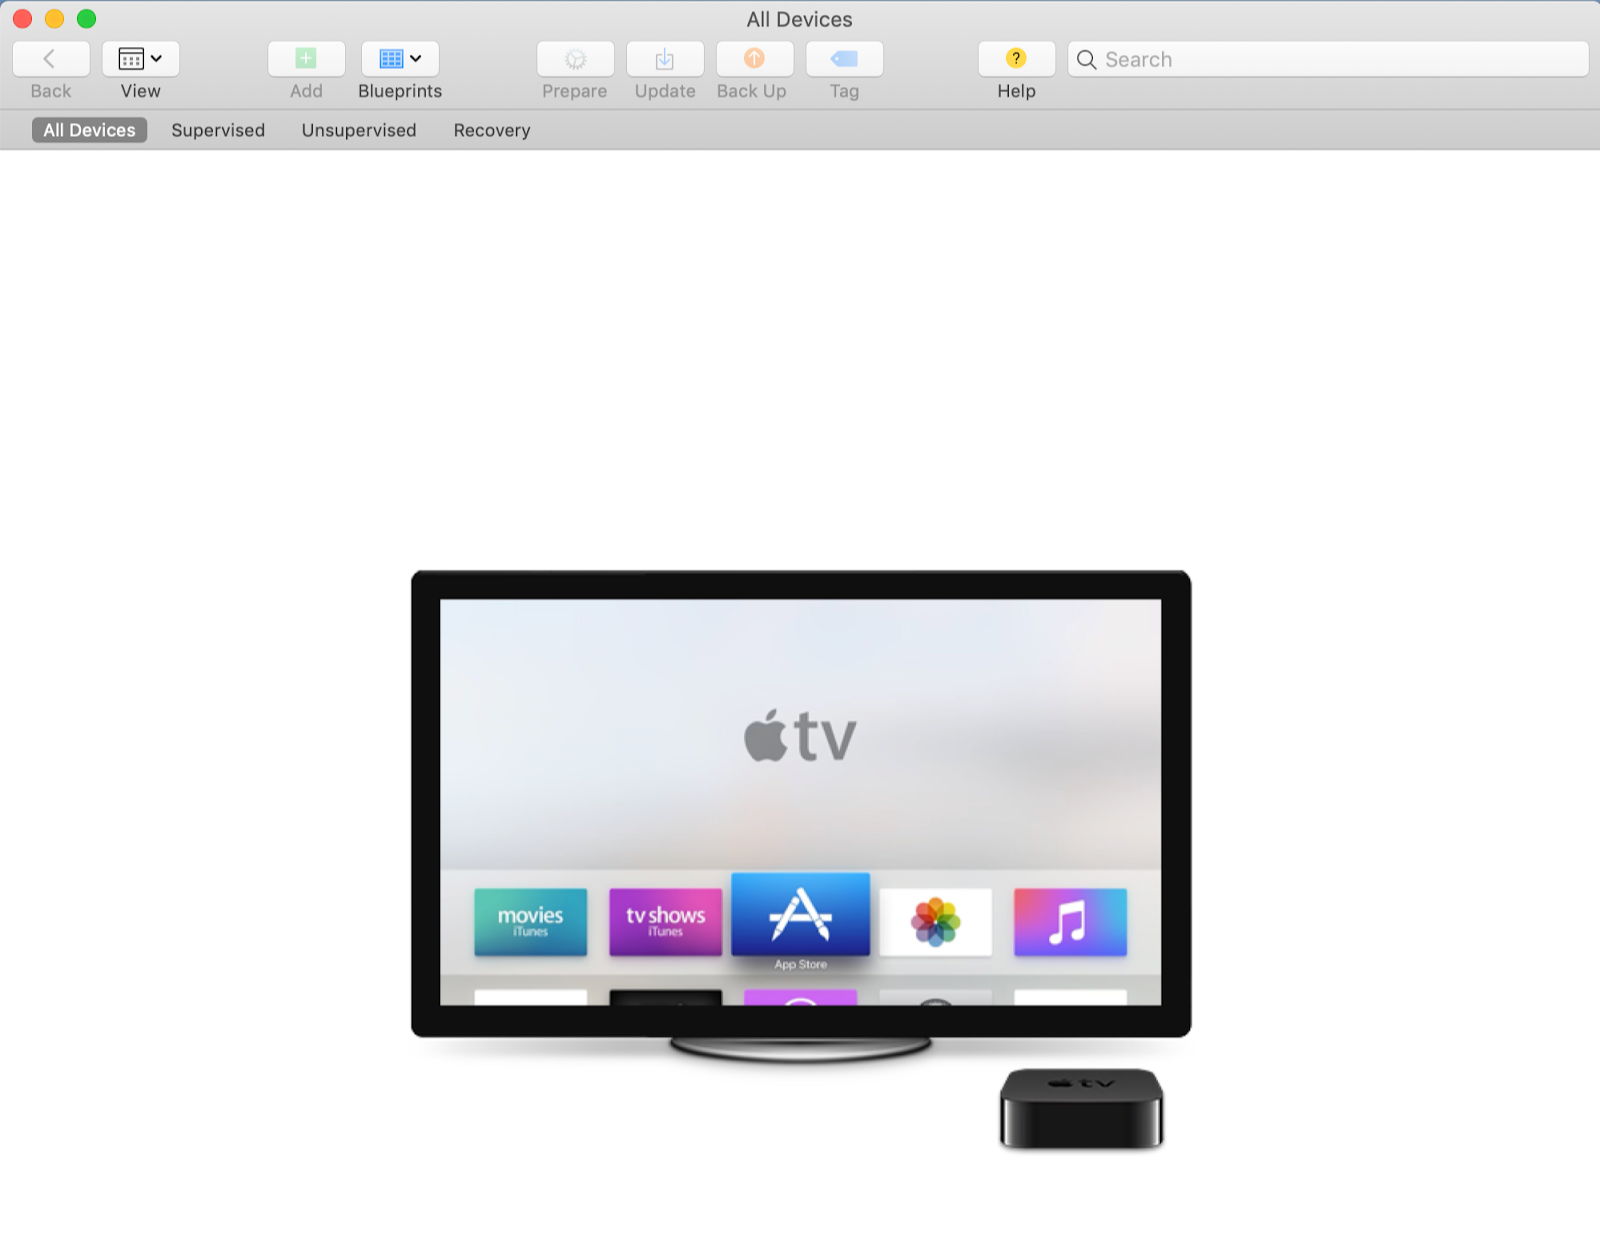
- On your Mac, open the Apple Configurator
- The Apple TV would pop up after that.
Another way to do this is to locate the Apple Configurator, and under Paired devices, click Pair. A code appears on your TV screen. Enter the code. Your device then gets paired to your laptop and shows on All devices.
For 4K Apple TV, and newer versions, follow the steps below:
1. Get your Apple TV connected to the wifi network on your PC.
2. Head to Settings and under Remotes and devices, click on Remote App and Devices on Apple TV.
3. Go to Apple Configurator and open it.
4. Under All Devices, the Apple TV should show up.
How Can I Supervise an Already-Set-up Device?
- If your device happens to have been set up, you need to check to see if it has been supervised. This can only be done once, so do the following:
- The steps shown above illustrate how to pair your Apple TV to your Mac.
- Navigate to supervised.
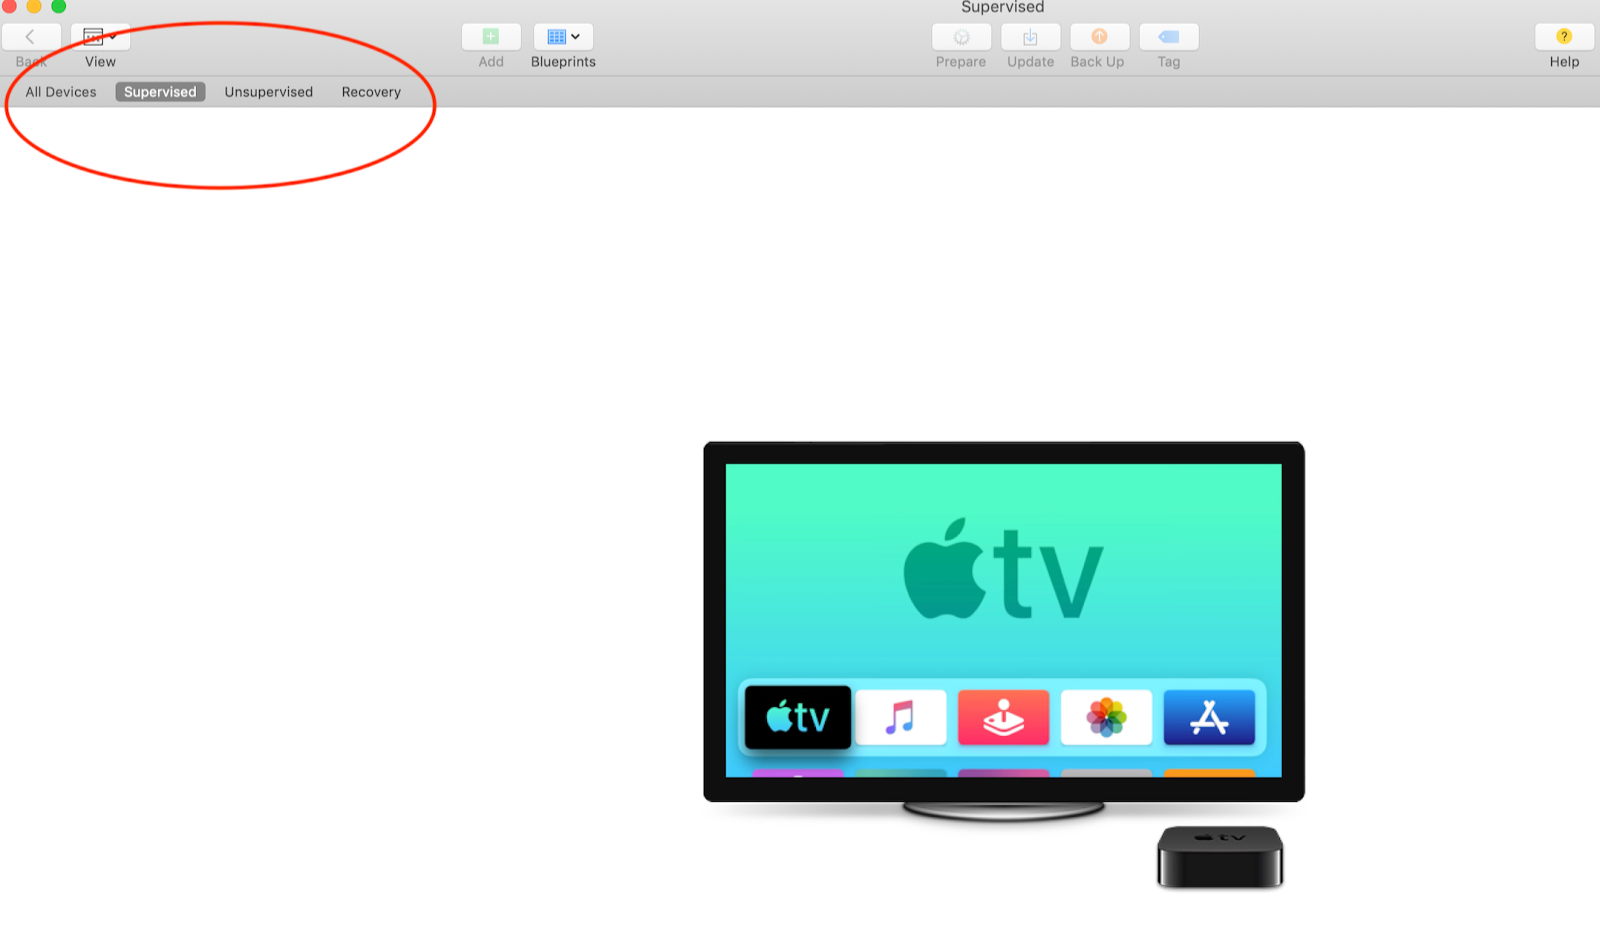
- Skip this part and move to Configure your profile if your Apple TV icon appears in the tab that has Supervised.
2. For a 4K Apple TV, get the Apple TV, as well as your Macbook connected to ethernet.
3. Next, Navigate to Settings; you’ll find System; click on the Reset and the Reset under that.
At this stage, don’t commence the set up of the Apple TV yet. Open the Apple configurator. Follow the steps on how to pair your Macbook to your device, shown above.
4. Select your Apple TV icon from the configurator.
5. Then right-click and choose Prepare from the Menu displayed. You can also go to the toolbar at the top and click on Prepare there.
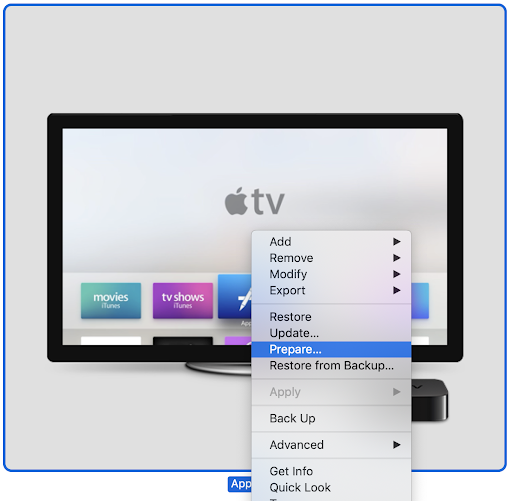
A dialog will be displayed with Manual configuration chosen from the drop-down display, ensure Supervise devices is ticked, then click Next.
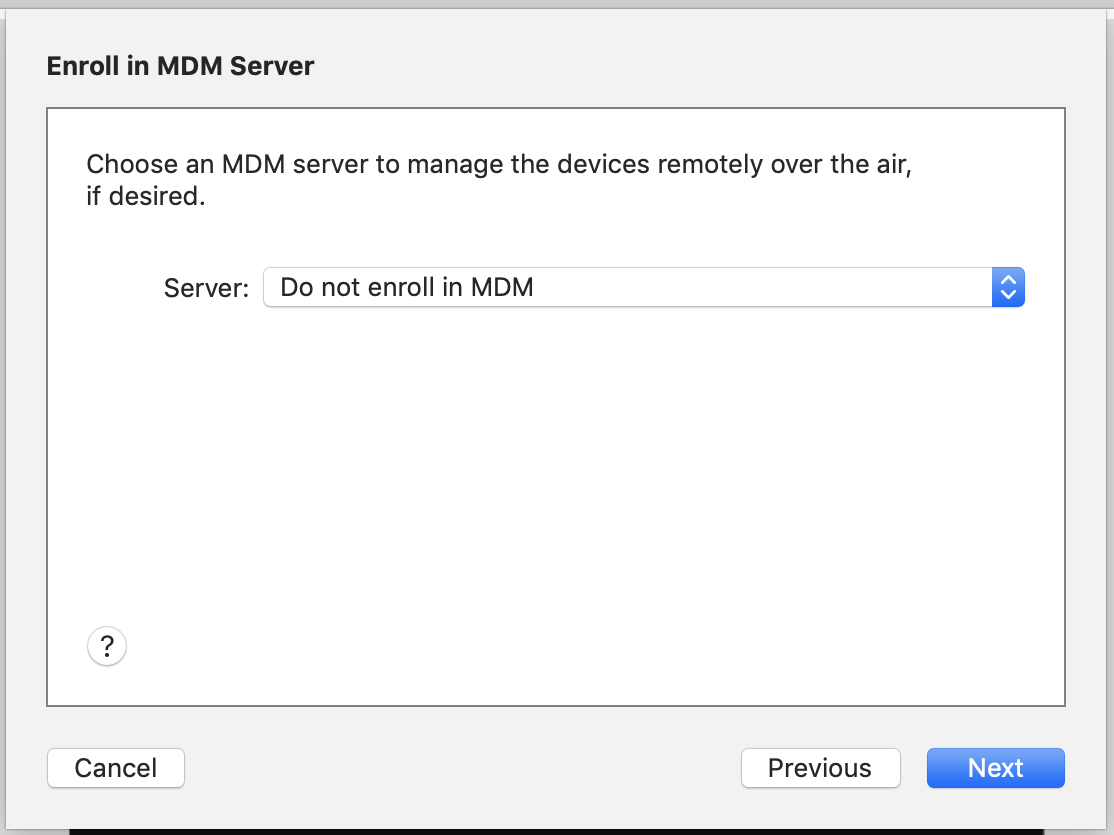
7. The following dialog inquires if you are interested in enrolling in an MDM. This is optional, however.
8. After this, you are asked to select an organization. By doing this, you save any settings you may need later. You can abandon the “New organization…” click on it, and go to Next.
- Something to note is that if you choose to make a new organization, you’ll be asked to Sign in to the Device enrollment program. Again, this is optional.
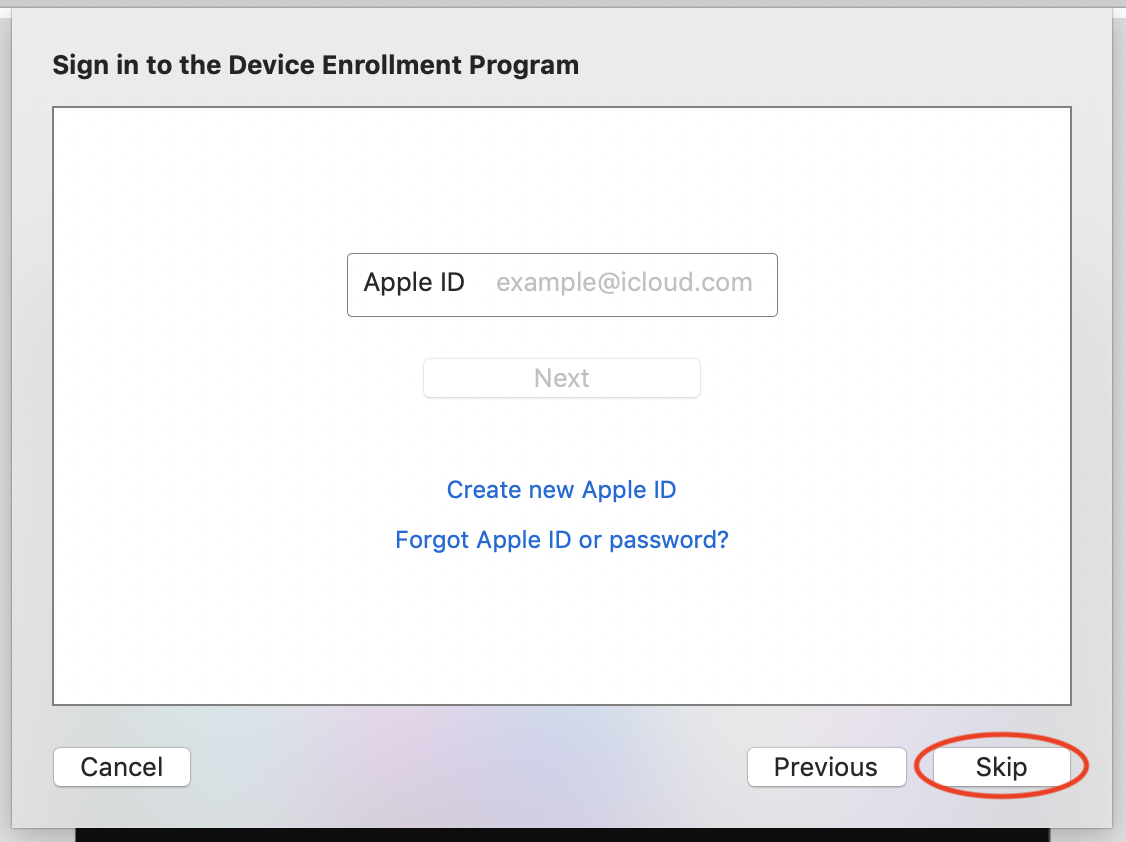
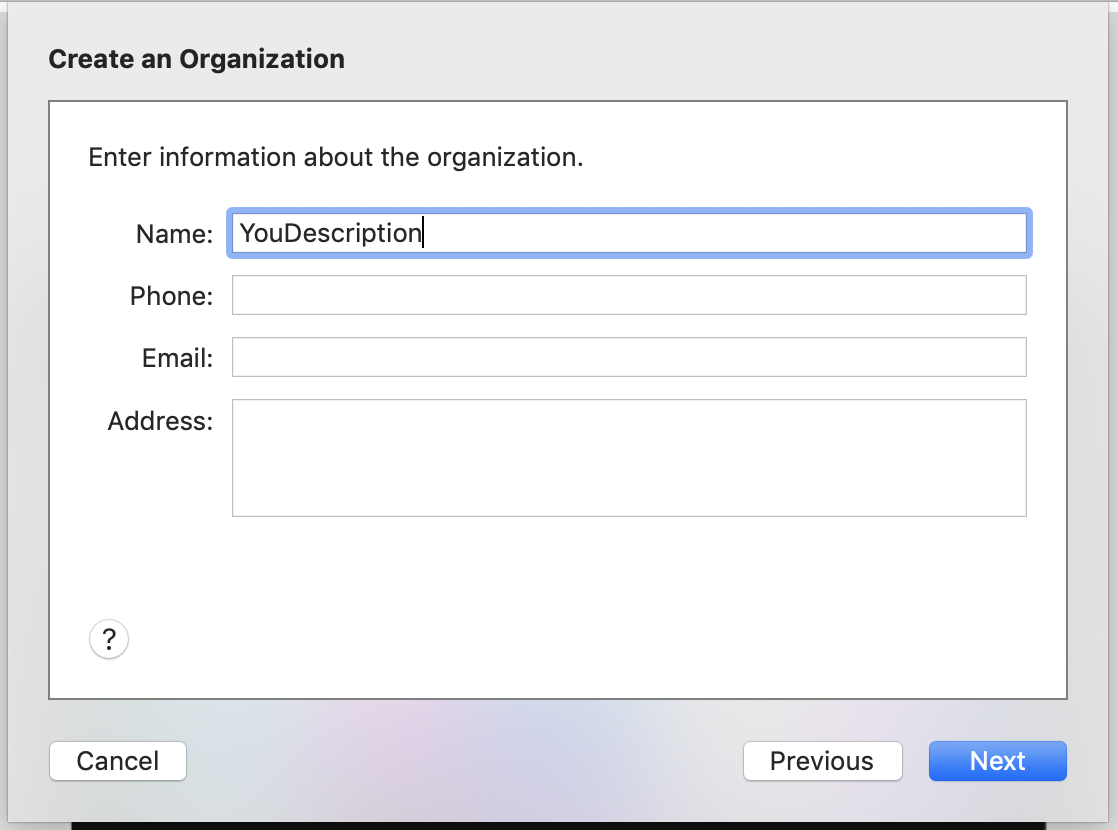
- The next step is entering any info about your organization. Enter whatever name you like and click Next.
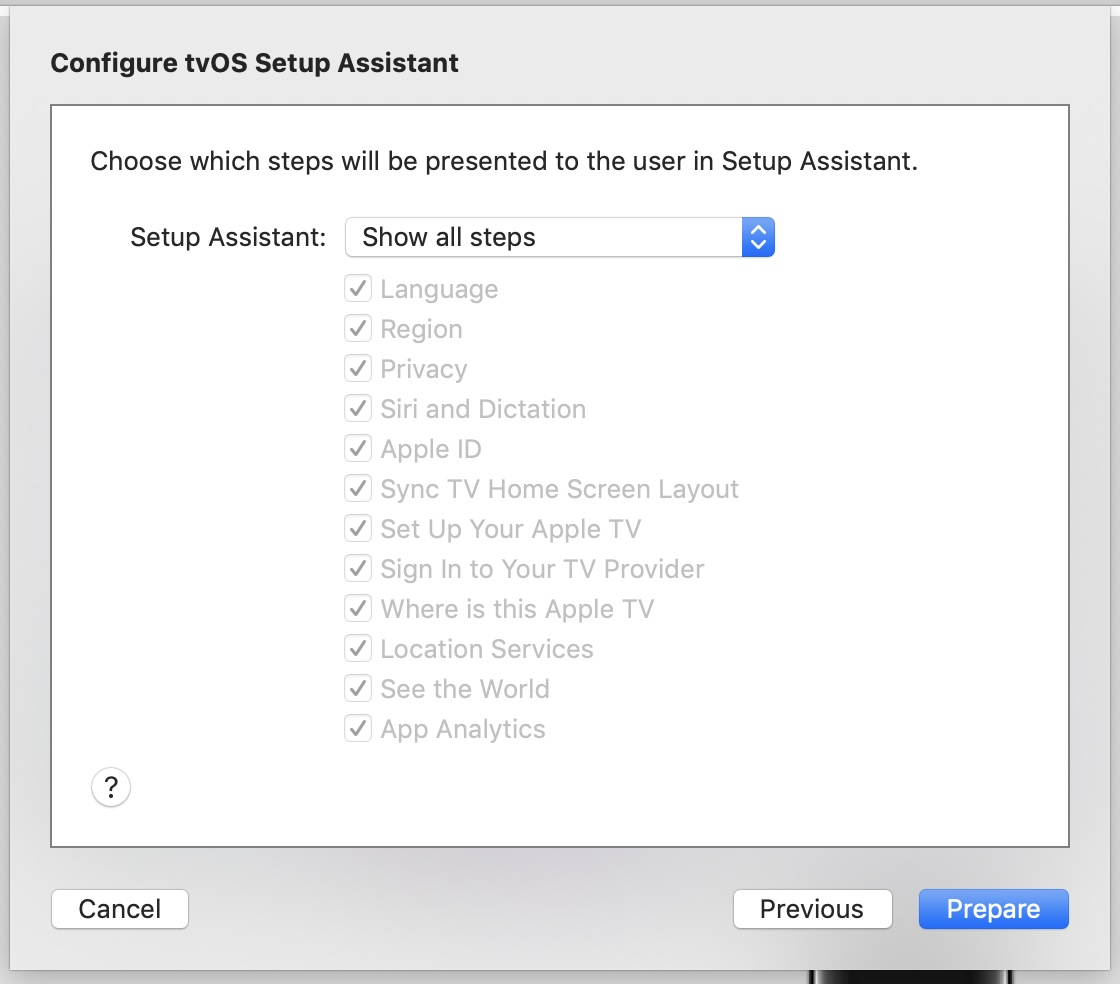
9. After you have selected an organization, you will be required to choose the steps shown. Select something there; however, if you’re unsure what to choose, select Show all steps and click Prepare.
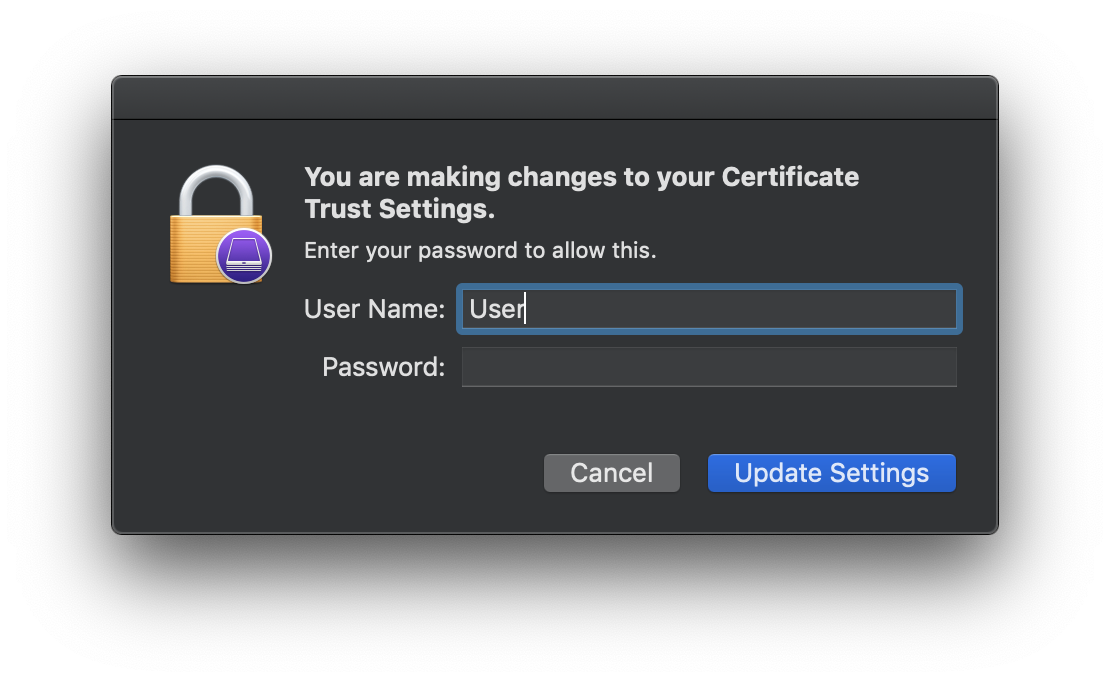
10. You may be required to login in with a macOS account with the benefits of changing “Certificate Trust Settings.” Log in with your account and choose “Update settings.”
11. If your device has already been set up, you will be informed that the device will be erased. Click Erase.
12. Wait for a while for your device to be prepared. Afterward, you can feed your profile into it.
13. For 4K AppleTV, after your device has been prepared, get it disconnected from ethernet if you will be using WiFi. After this, pair your remote with it and set it up.
How Can I Configure my Profile?
- Go to Apple configurator. Scroll to “File,” then “New Profile.”
- Name your profile. Choose something that stands out. You would have to signify what proxy you’re configuring for.
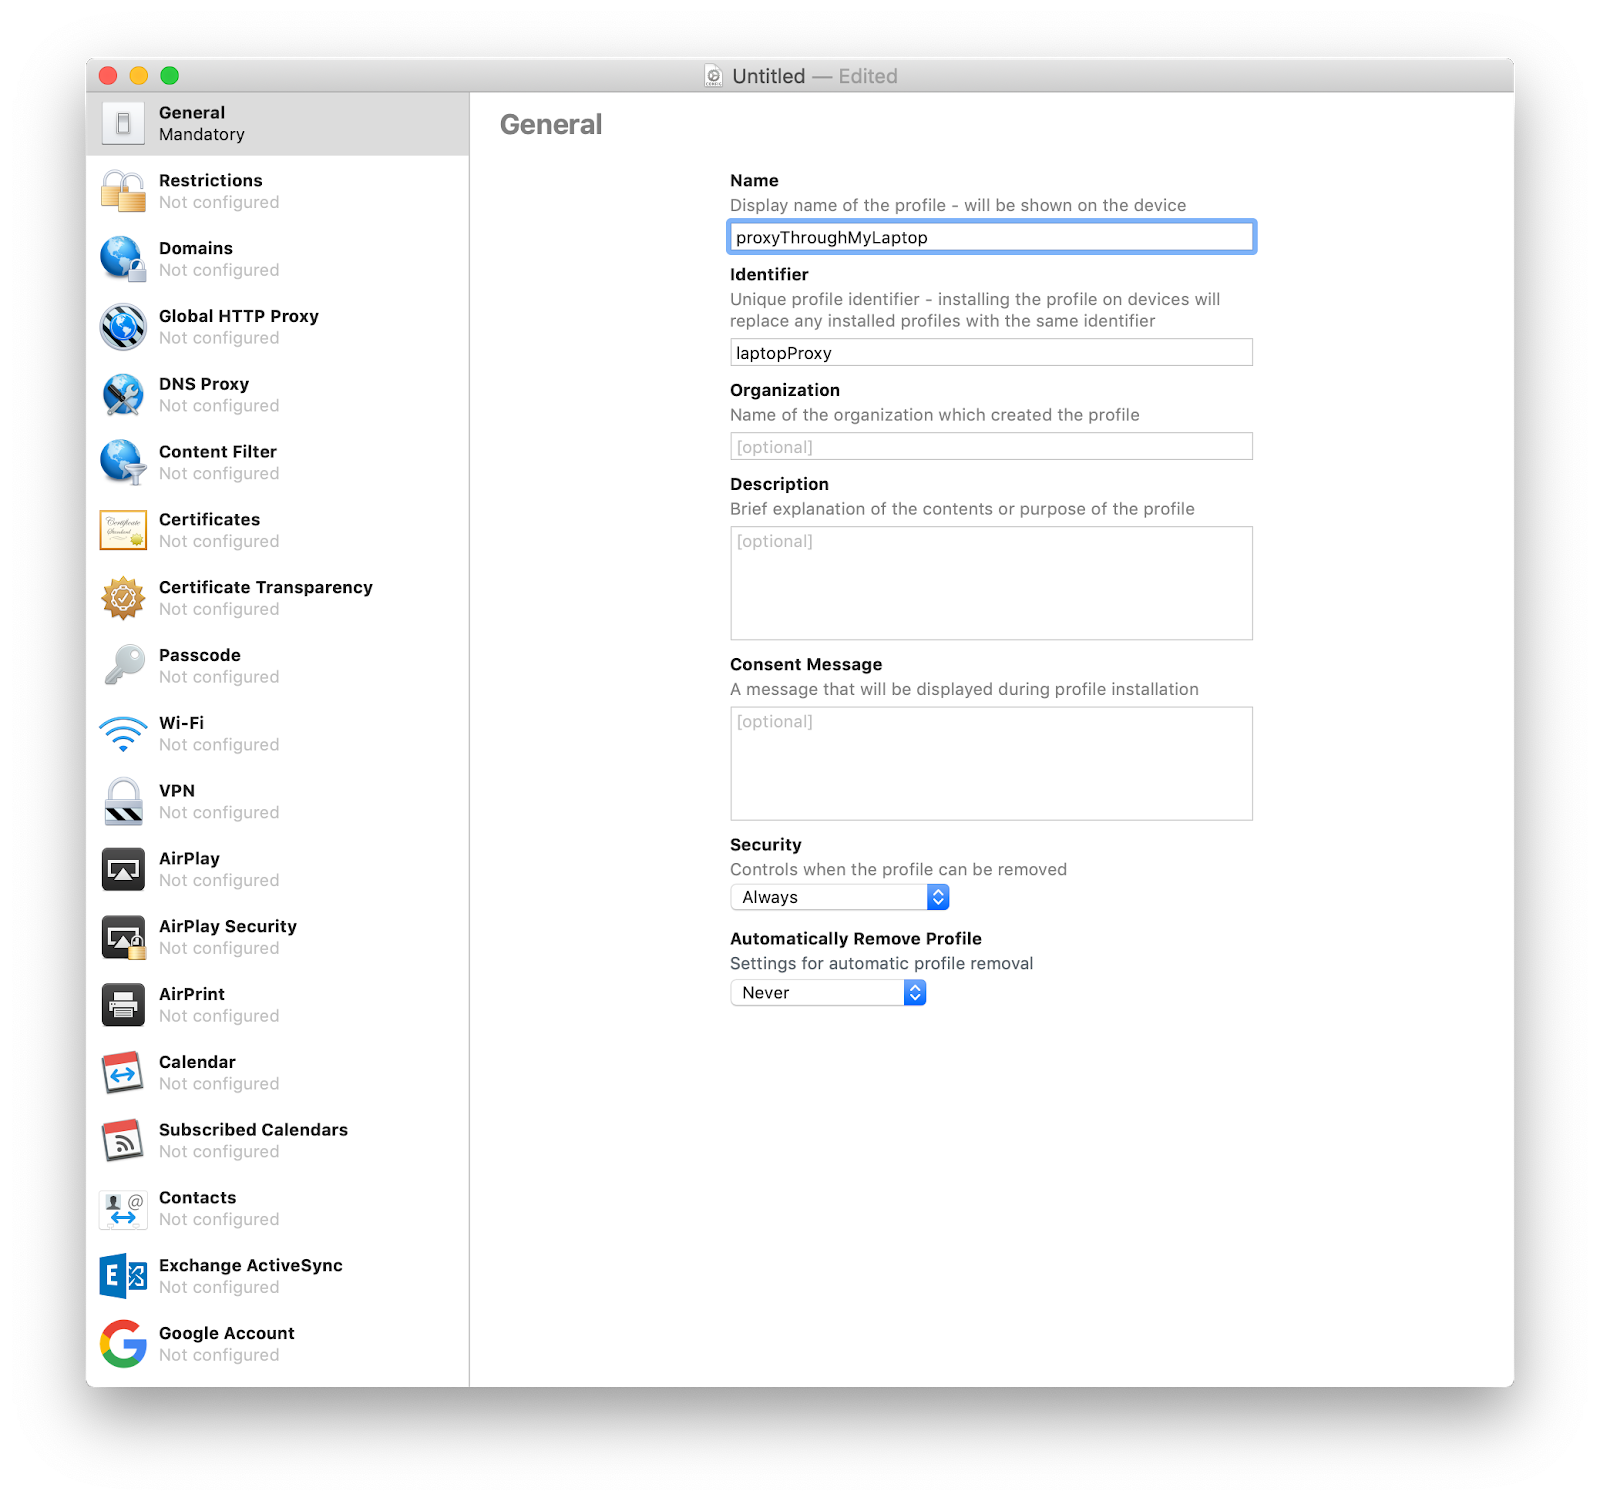
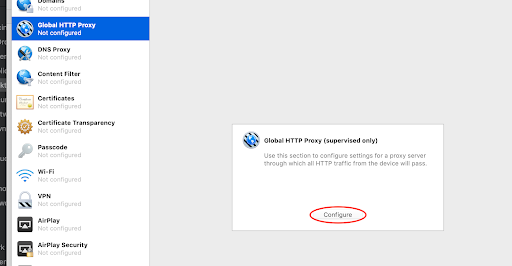
- Choose Global HTTP on the top part of the left, then click Configure.
- Next, fill in the IP address of the machine running Charles and 8888 for the port. 8888 is a default port number.

- Go to Charles proxy, then to Help, then to SSL proxying. Under that, find “Save Charles Root Certificate.” Ensure the file is saved as .cer
- Go to your Keychain. Double-click “New certificate.” Ensure the trust settings are on “Always Trust.”
- Go back to the profile newly created in Apple Configurator. Choose “Certificate,” configure it and upload the certificate in .cer file format. The name can be changed to anything you want it to be.
- Now you can close the profile after you have saved it. You can always upload this profile from your saved location any other time. Note that you may need to edit or create a new one if your Charles certificate or IP address changes.
How can I Install my Apple TV Profile after I Have configured it?
- Firstly, you will need to connect the Apple TV to your laptop, as shown above.
- Go to the configurator and open it.
- The Apple TV will pop up under All “Devices and Supervised.”
- Double-click the icon of the Apple TV.
- Look to see if a Charles profile had previously been installed. If it has, then remove it.
- Click the back arrow you see and select the Apple TV icon.
- Go to “Add,” and under it, click on “Profile.”
8. Next, right-click and choose “Add” then “Profile” from the menu displayed.
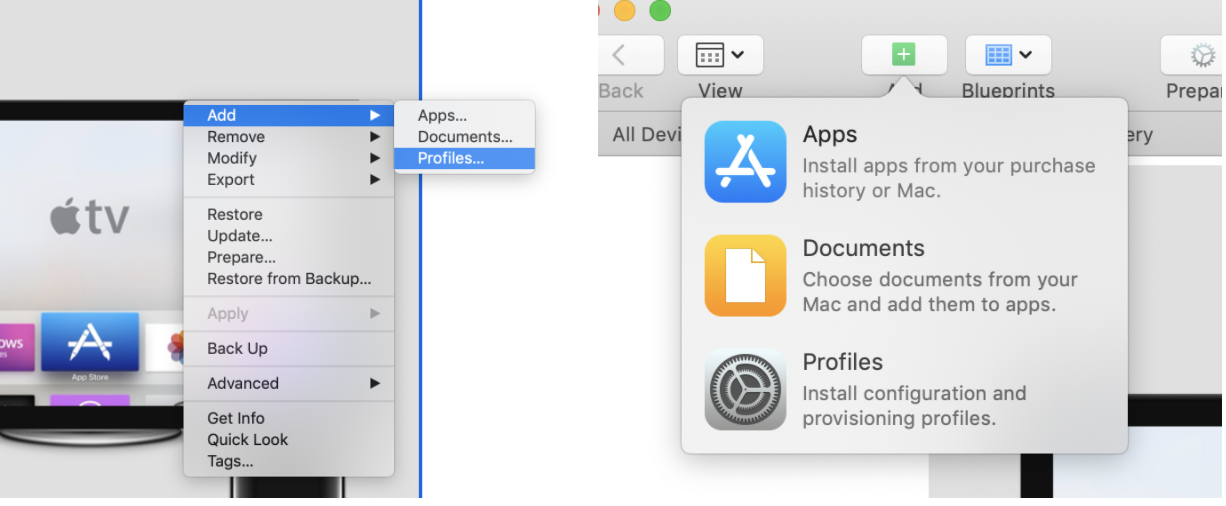
- Navigate and find the profile you created, then click “Add.”
- After some time, restart your TV. Also, restart Charles Proxy.
To learn more about VPN’s check this article out
How to Use VPN with Your Apple TV
Apple TVs do not automatically support VPN software. This, however, doesn’t stop you from securing it with a VPN connection. Setting up a VPN is a great way to enhance your digital security.
A good way to do this is by using a WiFi router. This way, all devices connected to the router will have encrypted access to the internet.
Below are the steps needed to set up a VPN on the router for your Apple TV.
- Go to your router configuration panel. You can access it by entering the IP address in your browser. If you are using a macOS device, here is how you can locate your rooster’s IP address:
- On the Apple Menu, go to System Preferences and open it.
- After doing that, click on Network.
- Then select Wifi, under that select Advanced, then TCP/IP
- Your router’s IP address will be shown next to Router.
- Look for a VPN client tab. It is usually located under the advanced settings of your router.
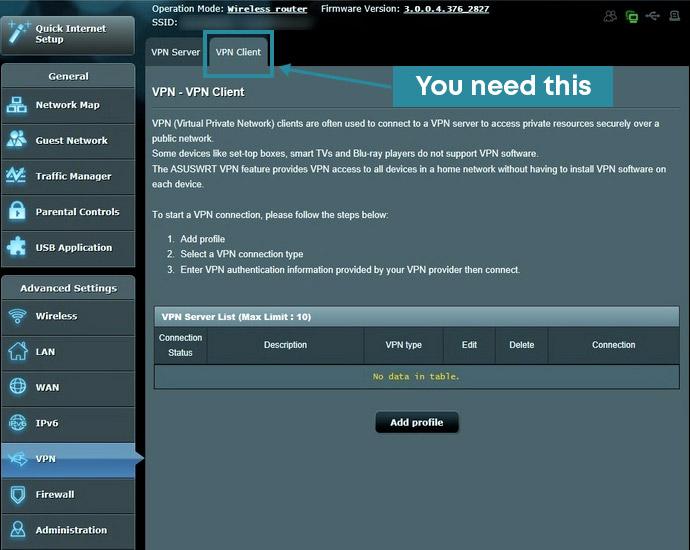
You would know if your router is not VPN-compatible if you don’t find it.
- Your VPN client will provide guidelines for you. Follow the guidelines.
- Ensure your connection is VPN-protected. To find out if it is, type “what is my IP” on google to see if the location shown differs from yours. Then check if you carried out the instructions rightly.
- Start using the router.
Is your router still not VPN-compatible? You can fix it this way
It is essential to note that flashing your router incorrectly can destroy your router. If you buy a router that isn’t VPN-client compatible, you can fix this using third-party firmware. The following steps show you how:
- Get the IP address of your router: You can skip stepping three of you already have.
For Windows 10 users,
- Go to the Start menu, click on it and type in Command Prompt.
- After this, type “ipconfig” and click Enter.
- Your Router’s IP address will be displayed on the “Default Gateway” lineup.
If you’re using macOS,
- On the Apple menu, go to “System preferences” and open it.
- Under that, click on “Network.”
- You will see a prompt that says “Select wifi,” click on it and choose Advanced, then next “TCP/IP.”
- Next to the Router, you will find an IP address.
- Next, you have to access your router. To do this, enter the IP in your browser. A prompt comes up that asks for your router’s username and password. If you have never changed your login and password then there will be default credentials in the router documentation and usually physically on the router near the serial number.
- If you’ve successfully logged in, the next thing to do is obtain your router’s firmware. To find out if your router is supported, go to the DD-WRT website. The search box there allows you to search for your router’s model. OpenWRT or Tomato are also two other places you can search for your router’s model if you don’t find it on DD-WRT.
- On the DD-WRT website, download the bin files for your router. You have to be very careful when doing this, as it can invalidate your warranty or damage the router all together.
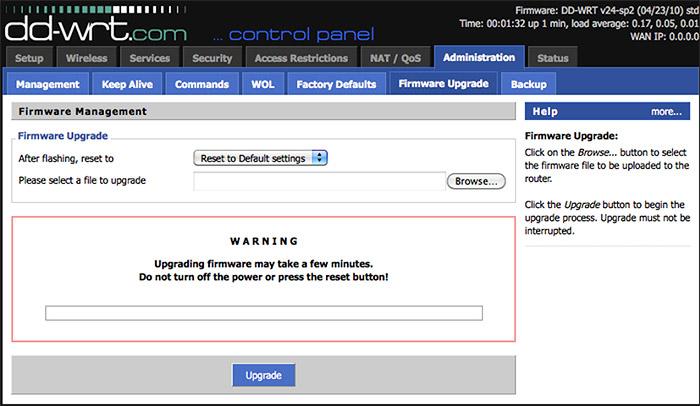
- Locate the firmware install page. For a lot of router interfaces, you will find this under “Administration.” Navigate through until you find it.
- Upload the bin file of the DD-WRT. Be very conscious of uploading the correct file. After you’ve uploaded it, wait for a while.
- Now, you can set a user name and password. The DD-WRP has a default IP of 192. 168.1.1. Type this into your browser. You’ll need to set a new username and password.
- Ensure your router is connected to the internet.
- Get ready to install. Go to the VPN tab under Services. You’ll find “Enable” close to “Start Open VPN client.”
- After you have successfully done this, follow the steps highlighted above to set up a VPN router.
Why are VPNs linked to Apple TV necessary for WiFi Security?
If you’re using an unsecured network, hackers can easily spy on the information sent across that network. This can be intercepted when you enter your password or your credit card information. In some cases, your keystrokes may even be monitored. This allows them to record your logins or private chats.
Cybercriminals can circulate malware over unsecured WiFi. You can’t also trust public WiFi even though they may require passwords. Hence, the need for a VPN. They allow you to encrypt your network traffic, protecting your data in transit from attackers.
VPNs work by connecting your computer or smartphone to a server. This enables you to access the internet using the server’s connection. It provides you access to a private network. This comes in very handy if you deal with sensitive information.
VPN use encryption to mask your data and make them unreadable. There is a range of VPN that you can use for your Apple TV. From client satisfaction and reviews, the top ones are NordVPN, ExpressVPN, and SurfShark.
How Can I set up a VPN using SmartDNS?
The use of SmartDNS is also highly recommended. However, it doesn’t protect your device as VPN connections do. NordVPN supports SmartDNS features. Follow the steps below to set up SmartDNS on NordVPN for your Apple TV:
- Safelist your IP address on your VPN account.
- Navigate to your Apple TV. Go to General, then Network.
- At the top, you will see WiFi. Click on it and choose your network.
- Under that, choose to configure DNS, then Manual.
- Enter the Smart DNS server address.
What should I Lookout For In VPNs?
There are a lot of VPN service providers out there. However, it’s difficult to choose the right one with optimal security features. These are things to look out for when getting a VPN for hour Apple TV:
- Strong encryption: Be sure to choose a VPN with updated encryption and reliable protection for a secure connection.
- Good customer support: This is necessary in case you’re faced with a problem.
- Ability to protect several devices: VPNs like this allow you to protect a couple of your gadgets like mobile phones and PCs with just one account. Another upside to this is that other members of your house can connect to it too.
- Protection against malicious threats: Another important feature to look out for is the ability of the VPN to prevent you from gaining access to sites that are blacklisted. It can also stop auto-play pop-up ads.
What Security Practices Can Keep my WiFi and Passwords Protected?
If you are really interested in keeping away bugs and cybercriminals from gaining access, there are a number of things you should include in your day-to-day usage of the internet and other data-sharing platforms.
- Use strong passwords: No matter how secure your password is, weak passwords always leave you susceptible to attack by hackers. Ensure that your password is adequately mixed with case-sensitive letters, numbers, and unconventional characters. You are better off using a passphrase rather than a password.
- Disable automatic connectivity: Some laptops can automatically connect to any available WiFi within reach. If, in this case, the network connected to your device is an unsafe one, you’re at the risk of being hacked if you don’t use a VPN.
- Enable two-factor authentication: Two-factor authentication requires users to verify twice before they gain access to accounts. In cases where your passwords have been hacked, 2FA prevents unwanted guests from accessing your account. If an unauthorized user can’t access your account, you will be notified of the intended breach.
- Be mindful of phishing: A VPN won’t stop a phishing attack or the consequences of clicking that malicious link. Cybercriminals will carry out phishing attacks by providing you with a link to visit or by asking you to confirm your login information. Links can contain malware or redirects to websites mimicking legitimate web pages.
Conclusion
Apple TV is another giant technological stride from Apple. Like any other device that runs on an internet connection, they can be susceptible to being hacked by cybercriminals.
Setting up your Apple TV can also pose a difficulty to you, which is why all the steps necessary to do that and also install and configure it was carefully highlighted here. Follow them promptly and also learn other ways you can keep your Apple device safe and secure.